
This lesson is made with PSPX9
But is good with other versions.
© by SvC-Design
Materialen Download :
Here
******************************************************************
Materials:
@nn_260407_photos_008_modelFemale_Kayla_tdstudio.psp
e&eSoleil-25040071718.psp
Susan 15.jpg
tekst.png
******************************************************************
Plugin:
Plugin - penta.com - Dot and Cross
******************************************************************
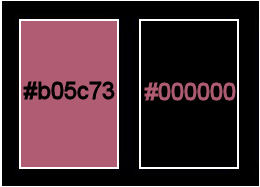
color palette
:
******************************************************************
methode
When using other tubes and colors, the mixing mode and / or layer coverage may differ
******************************************************************
General Preparations:
First install your filters for your PSP!
Masks: Save to your mask folder in PSP, unless noted otherwise
Texture & Pattern: Save to your Texture Folder in PSP
Selections: Save to your folder Selections in PSP
Open your tubes in PSP
******************************************************************
We will start - Have fun!
Remember to save your work on a regular basis
******************************************************************
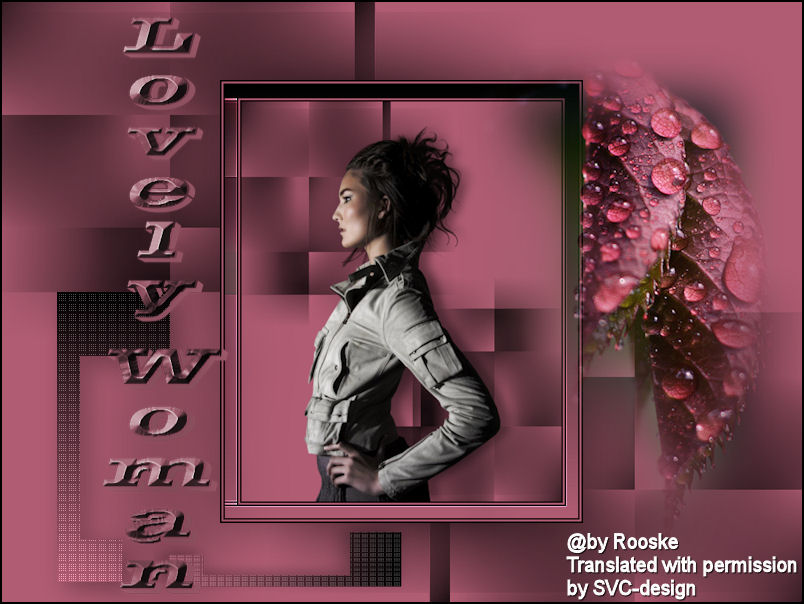
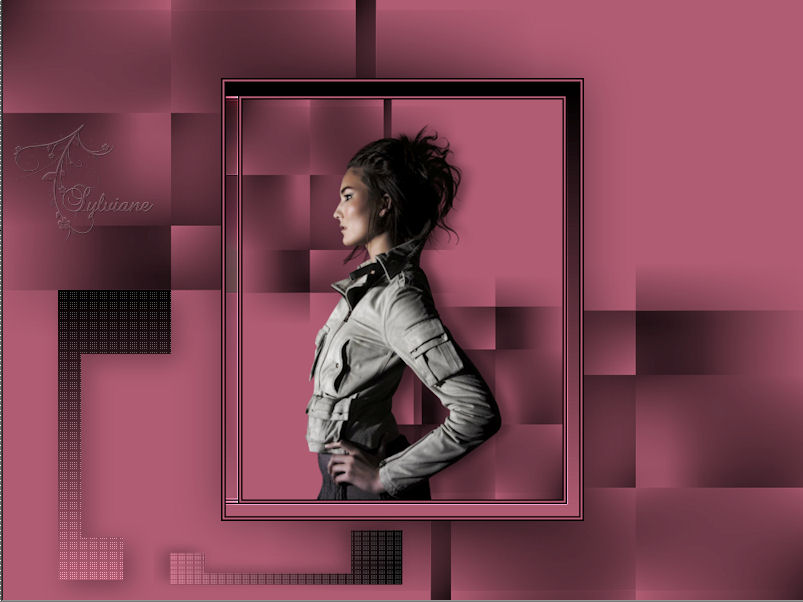
1.
Open a new transparent image of 400 X 500 pixels
2.
Fill with with foreground color.
3.
Layers - New Raster Layer
fill with background color
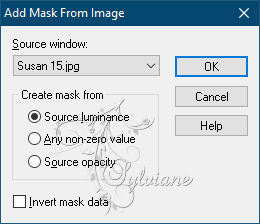
4.
Layers - New Mask Layer - From Image - Susan 15.jpg
5.
Layers - Merge - Merge Group
6.
Adjust – scharpness – scharpen
7.
Open @nn_260407_photos_008_modelFemale_Kayla_tdstudio.psp
Edit – Copy
Edit - Paste as new layer
8.
Image - Resize 80%, uncheck Resize all layers.
9.
Effects 3D effects - drop shadow:
0/12/ 40/ 15 color:#000000
10.
Layer – merge – merge all (flatten)
11.
Image - Add Borders -2 pix - dark color
Image - Add Borders - 2 pix - light color
Image - Add Borders -2 pix - dark color.
12.
Selection - Select All
13.
Image - Add Borders -15 pix - white color
14.
Selections - Invert
fill with gradient
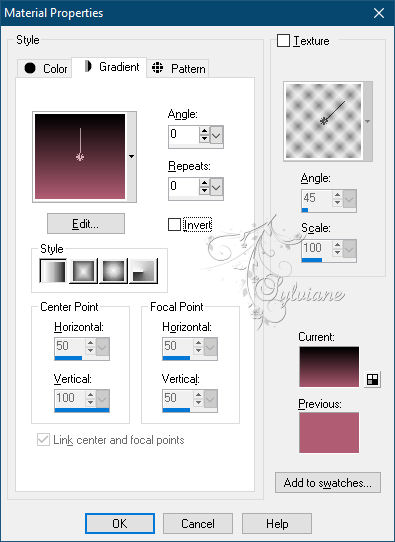
15.
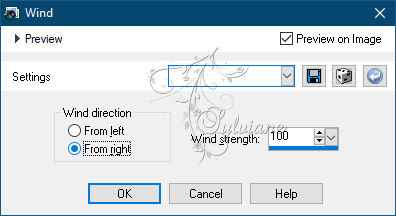
Effects - Distortion Effects - Wind at 100 from the right
16.
Effects - Edge Effects - Enhance
17.
Selection - Select None
18.
Image - Add Borders -2 pix - dark color
Image - Add Borders - 2 pix - light color
Image - Add Borders -2 pix - dark color
19.
Image - Resize 80%, uncheck Resize all layers.
20.
Edit - copy.
21.
Open a new transparent image of 800 X 600 pixels
22.
Fill with foreground color.
23.
Layers - New Raster Layer
24.
Fill with background color.
25.
Layers - New Mask Layer - From Image - Susan 15.jpg
26.
Layer – merge – merge all (flatten)
27.
Paste as new layer (still in memory of your mouse)
28.
Effects - 3D Effects - Drop Shadow
0/0/ 37/ 70 color:#000000
29.
Layers - New Raster Layer
take your selection tool on rectangle.
30.
Draw a marquee as in my example
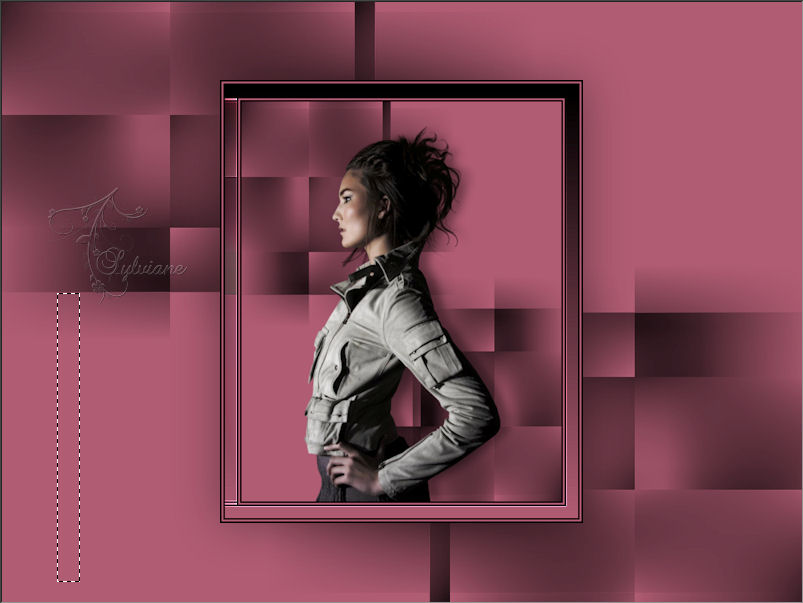
31.
Draw another selection above and below over the previous selection, see example

32.
Fill the selection with your gradient.
33.
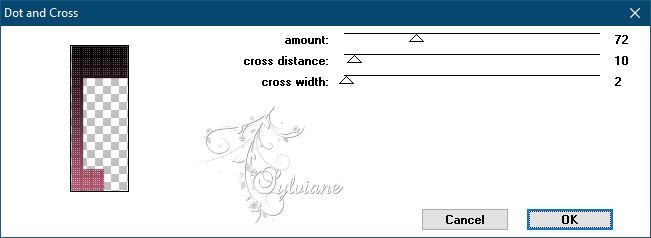
Plugin - penta.com - Dot and Cross- default
34.
Selection - Select None
35.
Effects - 3D effects - drop shadow
8/8/ 30/ 35 color:#000000
36.
Layers – Duplicate
37.
Free rotate image - 90°left.
38.
Image - Mirror – mirror Horizontal
39.
Resize image 80%, uncheck Resize all layers.
40.
Set as in example.
41.
Layers – merge – merge down
42.
Open e&eSoleil-25040071718.psp
Edit – Copy
Edit - Paste as new layer
43.
Resize image 80%, uncheck Resize all layers. Put them like in my example.
44.
Layer – merge – merge all (flatten)
Make your creation 600px longest side.
45.
Open tekst.png
Edit – Copy
Edit - Paste as new layer
46.
Resize image 50%, uncheck Resize all layers.
47.
Image - Add Borders -2 pix - color:#000000
48.
Put your name on your creation and make them 600 pix longest side.
49.
Adjust – scharpness – scharpen
Copyright Rooske
Back
Copyright Translation © 2021 by SvC-Design